
Building Replacement Drawers for Vintage Furniture
Jul 21, 2025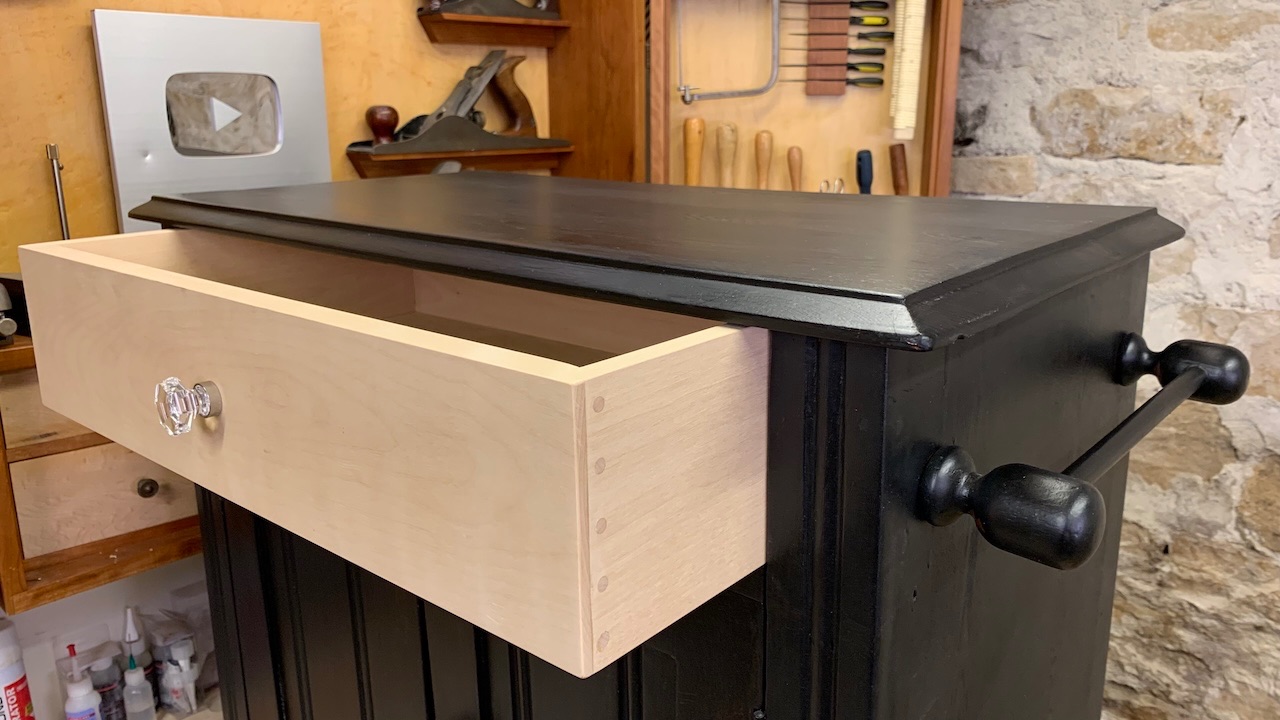
Making a traditional drawer to replace a missing or broken drawer is a project that requires woodworking skills and tools. It's not a project for a novice. I walk through the various measurements and joinery to build a traditional drawer in this YouTube video. I'll describe the process here.
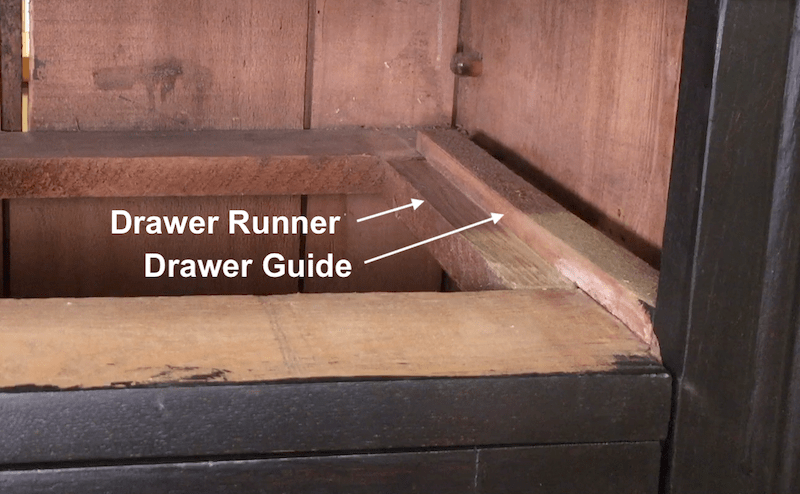
The process begins with inspecting the drawer opening. It should have two runners on either side of the opening to support the drawer. On top of the runners, to the side, are guides, which keep the drawer running straight into the drawer opening. The third component is the "kicker", which is a strip of wood mounted above the drawer to prevent it from tipping down once it's partially pulled out - in the video, there is a cabinet top that prevents the drawer from tipping out. Lastly, there's a drawer stop, which prevents the drawer from being pushed into the furniture too much. If all the parts are intact and in good shape, it's time to take some measurements for the drawer.
Planning the Drawer Build
This cabinet has some existing doors that have a 1/16 inch of a gap around them. I want to make the drawer match the cabinet so I will use this measurement when building the drawer. I measure the width of the drawer opening and subtract 1/8 of an inch, which allows 1/16 of space on each side of the drawer opening. I measure the height of the drawer opening and also subtract 1/8 of an inch. The third measurement is the depth of the drawer (front to back) from the front of the cabinet to the stop block.
Drawer construction is done in a specific way to withstand the forces of pushing and pulling the drawers. The drawer fronts are attached at the sides with dovetail or pinned joinery. The back of the drawer is inserted into a dado (a groove cut across the sides). This provides maximum strength. The bottom of the drawer slides into a groove cut near the bottom of the drawer so it is well supported to handle the weight of the drawer contents.
The material I used for this project was 3/4 inch Birch for the drawer front, 1/2 inch Birch for the drawer sides and back, and 1/4 inch Birch plywood for the bottom. Birch is a hardwood and holds up well to long-term use. In some furniture such as antiques, you may find softwood drawers made out of pine. If that's the case for the furniture you're working on, use the same wood species to match the furniture. The most important part is ensuring you use flat material, without warps or twists.
Cutting Steps for Drawer Joinery
Here the steps to cut the boards and the joinery for the drawer. This is much easier to understand by watching the video but this list gives you the steps to follow when you build the drawer.
- Cut the drawer face to length
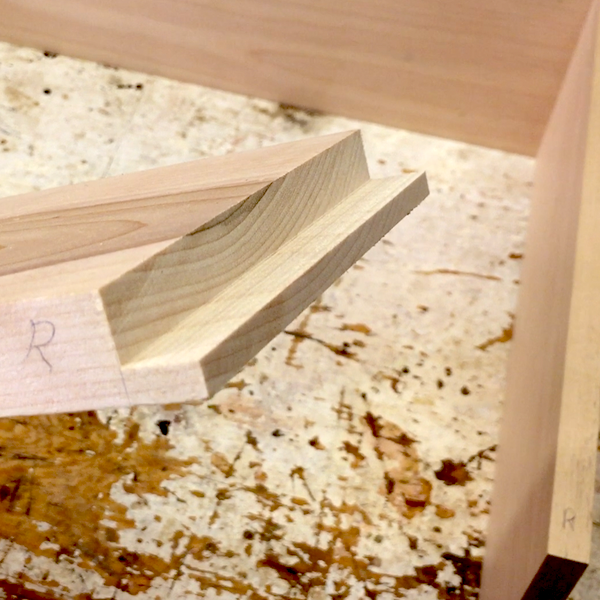
- Cut a rabbit on the ends of the drawer face to accept the full thickness of the drawer sides. This should be about 2/3 deep into the drawer face as it will be pinned with dowels once the drawer is assembled.
- Cut the drawer sides to length
- Cut the dado in the drawer sides to accept the back, cutting the dado 1/4 inch wide
- Measure and cut the back to length (long enough to fit into the dados of the drawer sides to make the drawer the same width at the back and front)
- Cut the rabbit in ends of the the drawer back to fit in the dado of the sides
- Cut the drawer front and sides to the right width, with the sides 1/16 inches wider than the drawer front
- Mark the top of the drawer front, sides, and back so they don't get mixed up in the next step - cutting the groove for the bottom
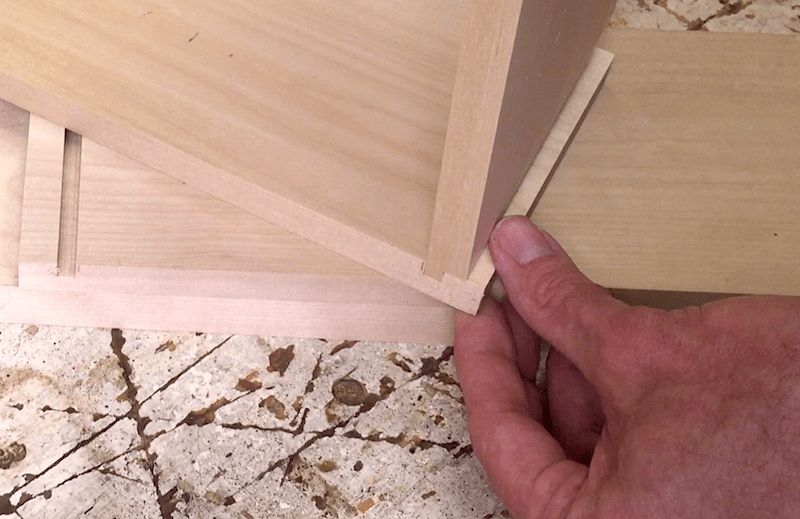
- Cut the groove for the bottom, while using the top of the parts to run against the table saw fence. At this point, only cut the grooves in the front and sides, not the back. Cut the bottom groove first, then make the groove wider by moving the table saw fence closer to the blade, until the groove is wide enough for the plywood to fit. Once you are happy with the width of the groove, raise the blade higher to cut through the back board, which will allow you to slide the bottom in place after the drawer is assembled.
- Cut the bottom panel to fit in the grooves and to be nailed in place to the back
Assemble the Drawer
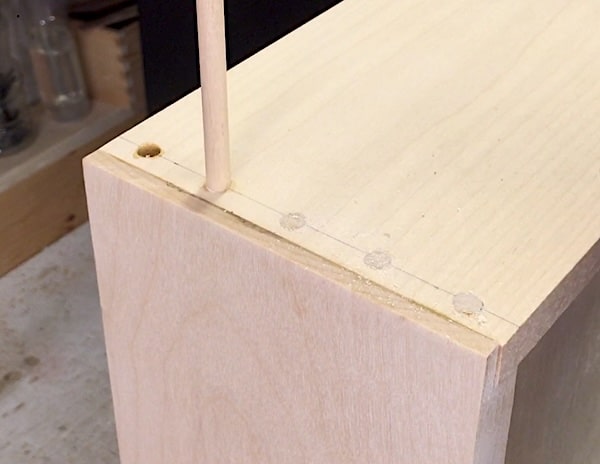
With all the parts cut, I glue the rabbit joints together at the front and the back. The bottom does not get glued in - it's intended to slide in place and get nailed at the back. I clamp the drawer and check for square by measuring diagonally across the corners to ensure they're equal. Once the glue has cured (usually 24 hours for most glues to come to full strength), I drill holes for the dowel pins at the sides of the drawer face to reinforce the rabbit joint.
Installing the Drawer
Once the drawer is built, it needs to be fit into the opening. This is done with a hand plane to make adjustments. The back, bottom of the drawer slides usually need trimming when working on vintage or antique furniture due to the wear that happens at the front of the drawer over time. Once the drawer is fit, it needs to be lubricated with candle wax or even better, apply a low friction tape to provide a smooth gliding action for the drawer. Here's a link to the low friction tape I use for traditional wood drawers.
For the hardware, choose pulls or handles that match the furniture you're working on. When locating hardware, I prefer to use a center finder ruler, which makes the process much easier. See the tool links below for the key tools I use.
Tools:
- Quality Miter Saw - https://amzn.to/3H0EXvE
- Quality Table Saw (safest type available) - https://amzn.to/4lYwSqe
- Center Finder Ruler - https://amzn.to/4kVuGyV
Note: purchases made with links in this blog post help fund our video production work
I hope this is helpful for you. My goal is to make furniture repair skills accessible for people to learn. If you're interested in learning how to repair furniture, take a look at our furniture repair courses and our Fixing Furniture Community.
Author: Scott Bennett, Co-owner, Wooden It Be Nice - Furniture Repair
Stay connected with news and updates!
Join our mailing list to receive the latest news and updates from Fixing Furniture.
